The instructions on this page are for getting the AWS instance running.
For more information on deploying a GIFT instance to an AWS VM, read these instructions.
Prerequisites to launching an AWS instance
- Create an AWS account and log in.
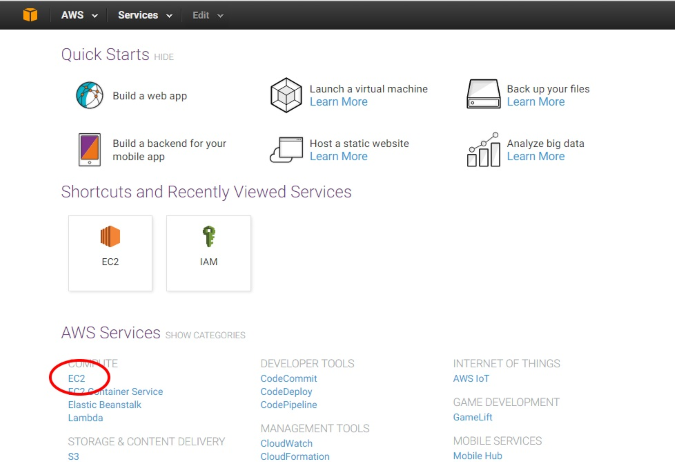
- Click EC2.
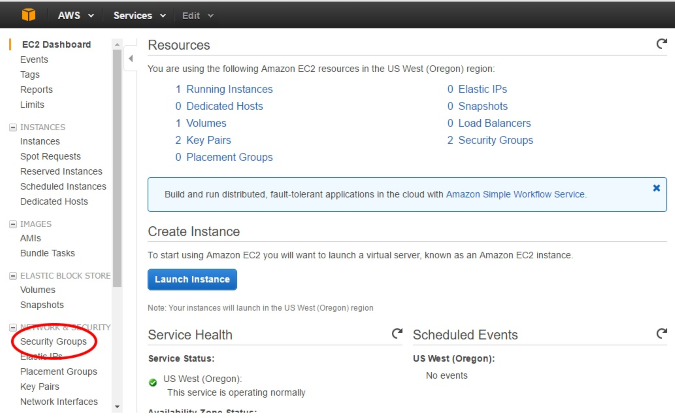
- Before launching an instance, you will need to create a security group. On the menu on the left, click Security Groups under Networks & Security.
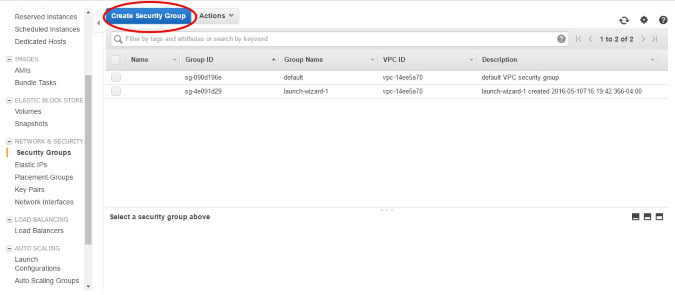
- Click Create Security Group.
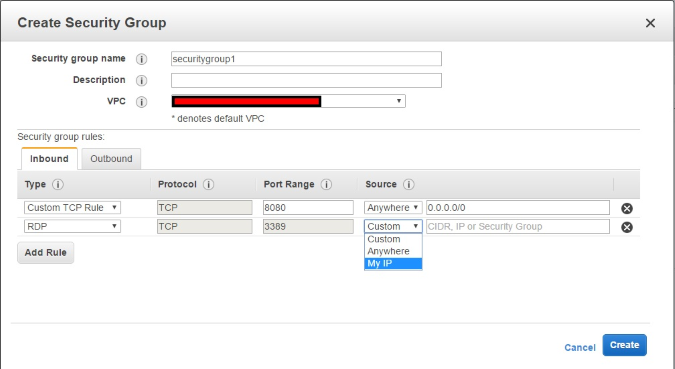
- Name and create a description for your new custom security group.
- Click Add Rule.
- Select Custom TCP Rule as the Type and 8080 as the Port Range.
- Click Add Rule.
- Select RDP as the Type.
- It is recommended that you select My IP as the Source. This prevents others from creating a remote desktop connection to the server.
- Click Create.
Launching an AWS instance
- Click Launch Instance from the EC2 Dashboard.
- You have the opportunity to choose an Amazon Machine Image. We recommend choosing the Microsoft Windows Server 2012 R2 Base option.

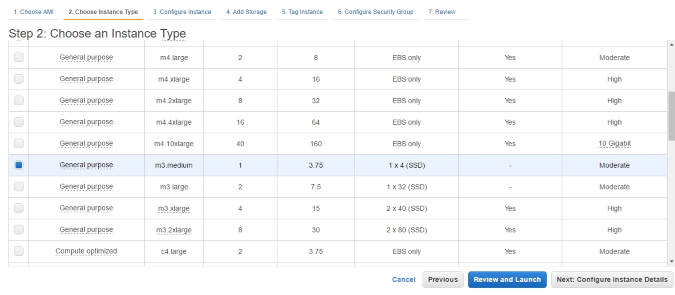
- You have the opportunity to choose an instance type. We recommend an m3 type. You may be able to run an instance on a smaller, lower-cost instance, but the performance of these other options may reduce usability for clients.
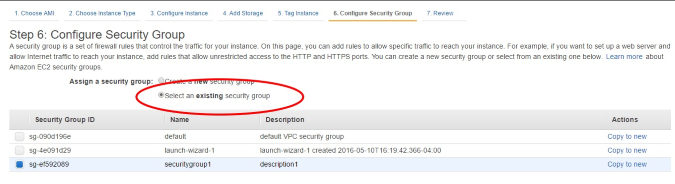
- Most of the default settings are adequate for running GIFT. At the top of the page, jump forward by clicking 6. Configure Security Group.

- Select the custom security group created in the above section.
- Click Review and Launch.
- Click Launch to launch your AWS instance.
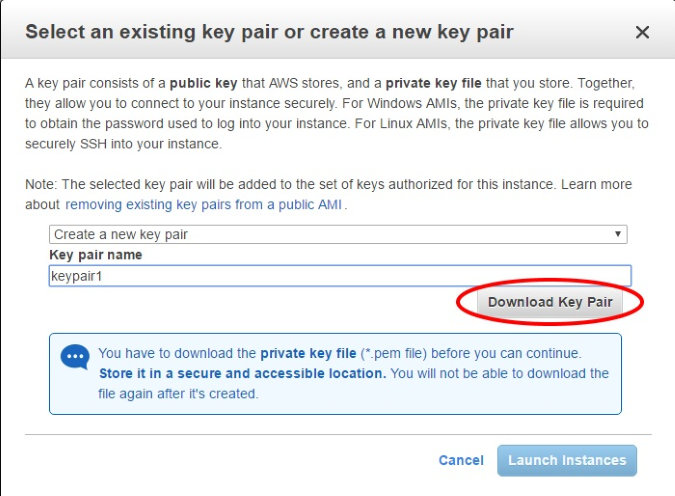
- When prompted for a key pair, select Create a new key pair. Name your key pair and then click Download Key Pair. You must download the key pair at this time. Save the key pair in a safe place. You will need to access the file to launch your instance.
- Click Launch Instances.
- It may take several minutes for your new AWS instance to launch. You can see the progress by selecting Instances from the menu on the left.
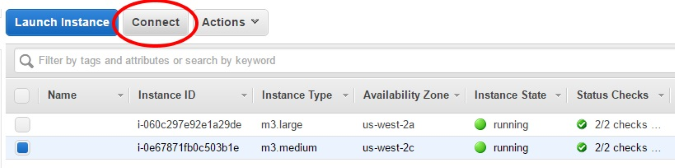
- To connect to your instance, select the instance from the Instances menu and click Connect at the top of the page.
- Click Get Password. This is where you will need the previously downloaded key pair.
- Click Key Pair Path, open the previously downloaded key pair, and click Decrypt Password.
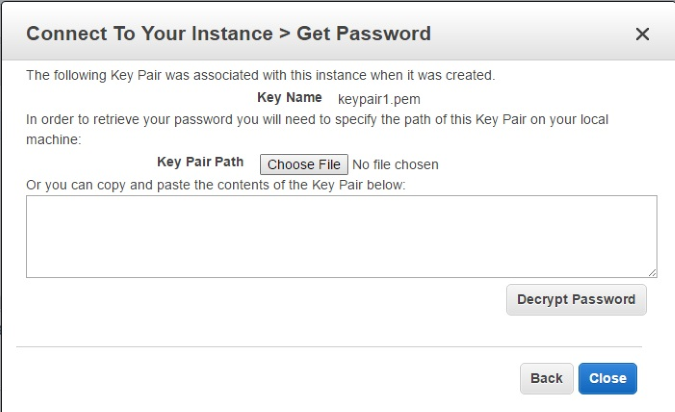
- The password that is shown after clicking Decrypt Password is the default administrator password to your AWS instance. You should record this for future use.
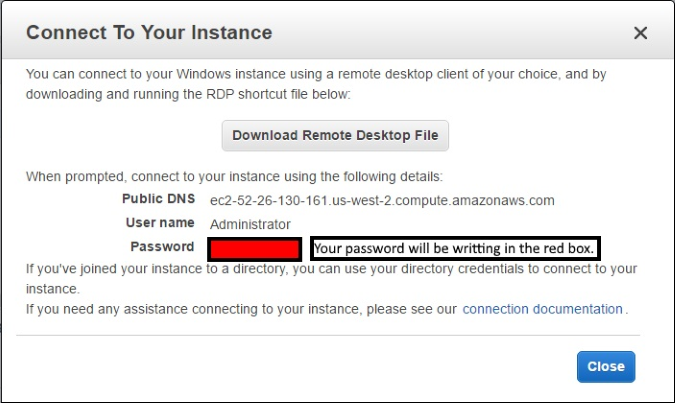
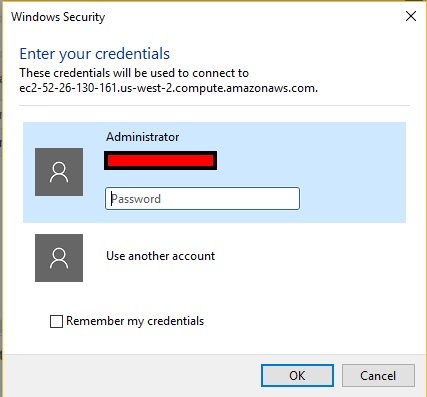
- Click Download Remote Desktop File and open the file. Use the username and password decrypted in the previous step to log in as the administrator.
- This opens a remote desktop to your AWS instance.
- Inside of the remote desktop, use Internet Explorer to go to the GIFT website, gifttutoring.org.
- Download, install, and run GIFT.
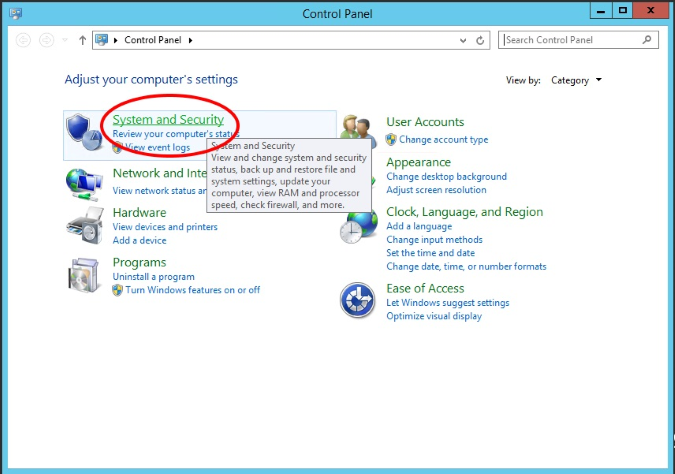
- Open Control Panel in the AWS instance.
- Click System and Security.
- Add or allow an app through Windows Firewall.
- Click Allow another app.
- Click Browse.
- Select javaw in the GIFT > external > jdk1.80_31 > jre > bin folder.
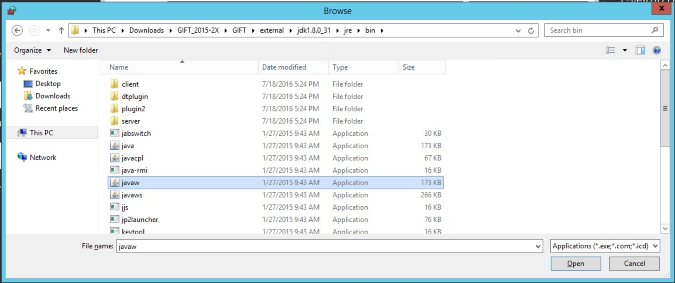
- Click Add.
- Click OK.
- Test accessing your newly configured instance of GIFT, minimize the remote desktop and try accessing the instance of GIFT from your own computer.
- To find the IP address of your server, select your instance on the Instances menu and at the bottom of the screen on the Description tab, find the Public IP.
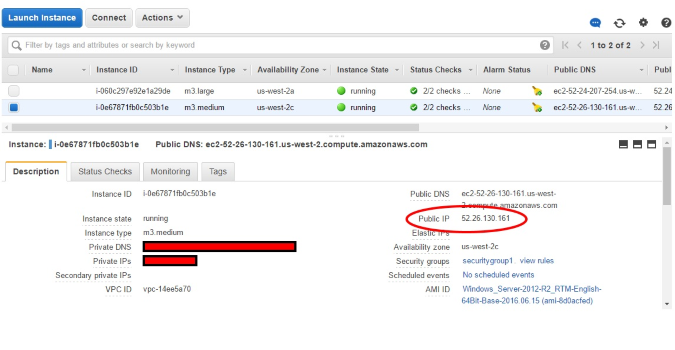
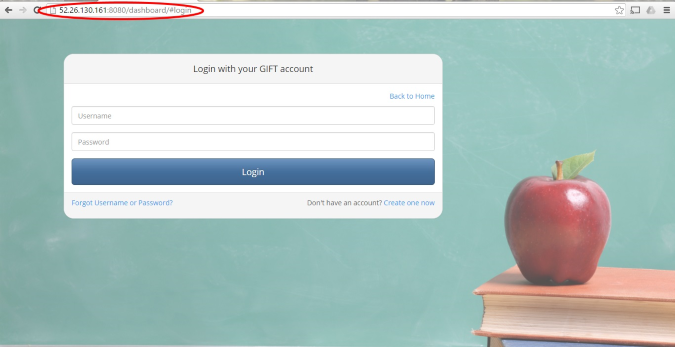
- Go to {public IP}:8080/dashboard.
How to terminate an AWS instance
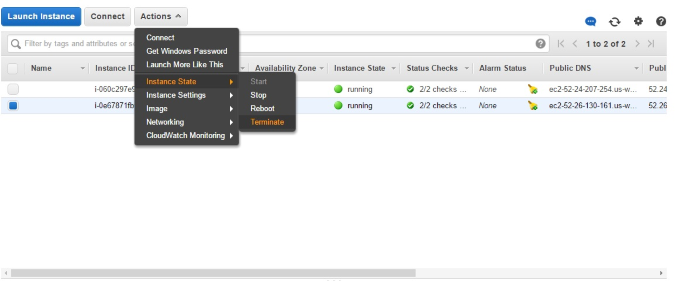
- Click Instances from the menu on the left
- Select the checkbox of the instance you want to terminate.
- Click Actions.
- Click Instance State.
- Click Terminate.